Tutorials
ospTutorial
A minimal working example demonstrating how to use OSPRay can be
found at apps/tutorials/ospTutorial.c1.
An example of building ospTutorial.c with CMake can be
found in apps/tutorials/ospTutorialFindospray/.
To build the tutorial on Linux, build it in a build directory with
gcc -std=c99 ../apps/ospTutorial/ospTutorial.c \
-I ../ospray/include -L . -lospray -Wl,-rpath,. -o ospTutorial
On Windows build it can be build manually in a “build_directory\$Configuration” directory with
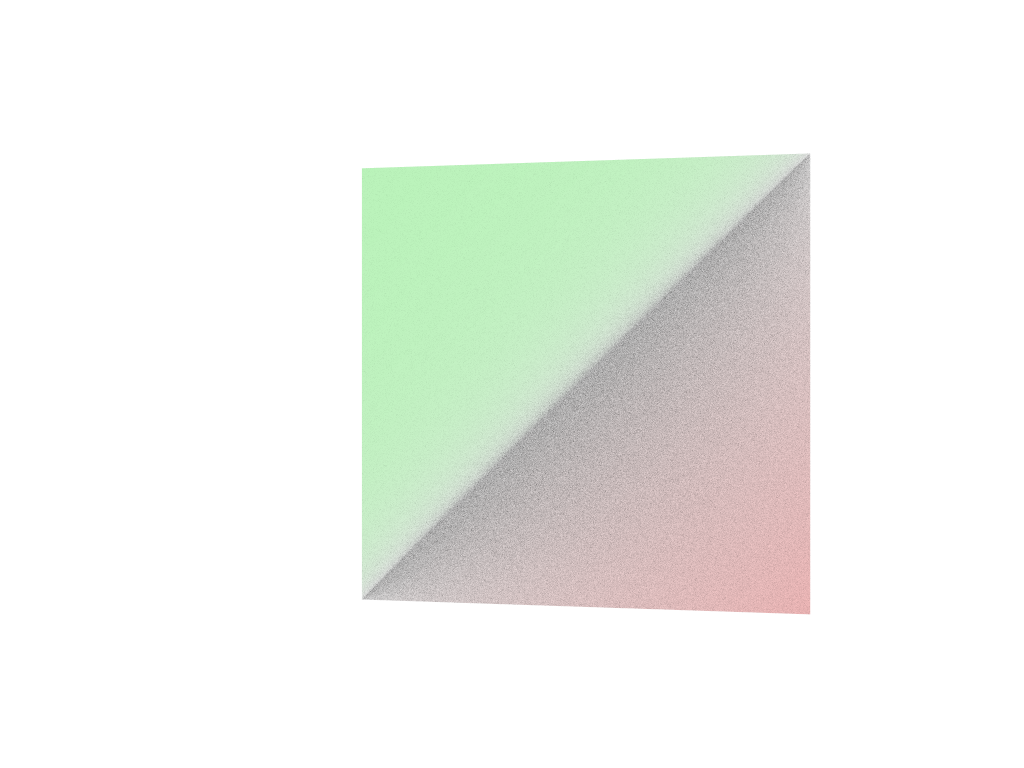
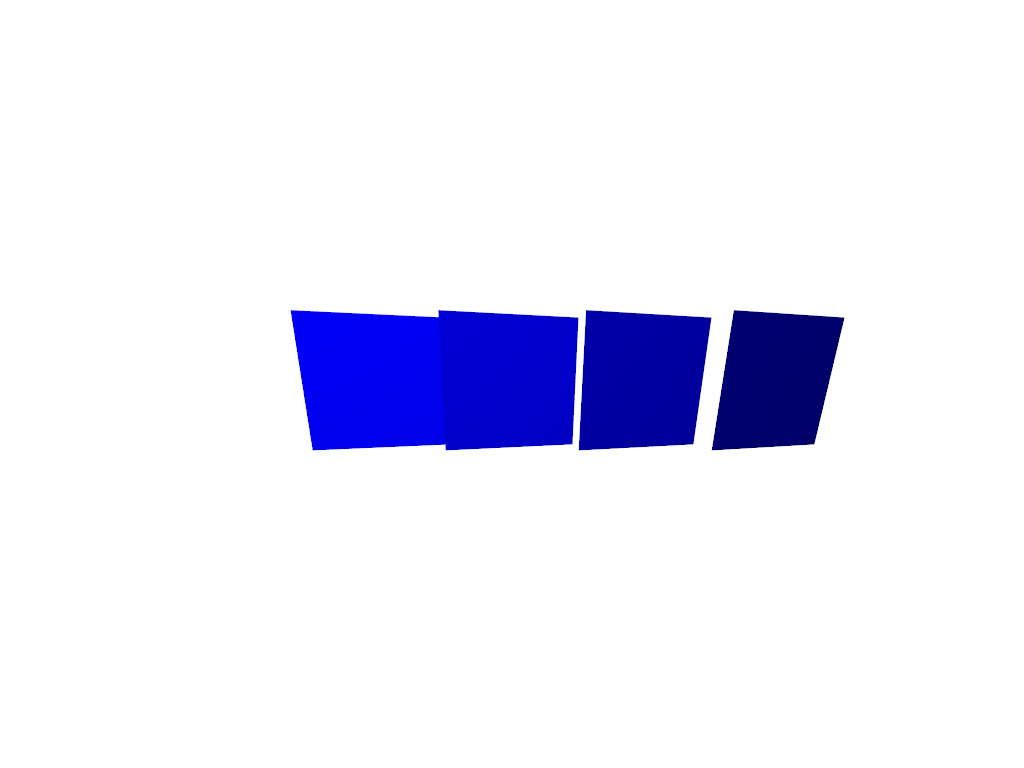
cl ..\..\apps\ospTutorial\ospTutorial.c -I ..\..\ospray\include -I ..\.. ospray.libRunning ospTutorial will create two images of two
triangles, rendered with the Scientific Visualization renderer with full
Ambient Occlusion. The first image firstFrame.ppm shows the
result after one call to ospRenderFrame – jagged edges and
noise in the shadow can be seen. Calling ospRenderFrame
multiple times enables progressive refinement, resulting in antialiased
edges and converged shadows, shown after ten frames in the second image
accumulatedFrames.ppm.

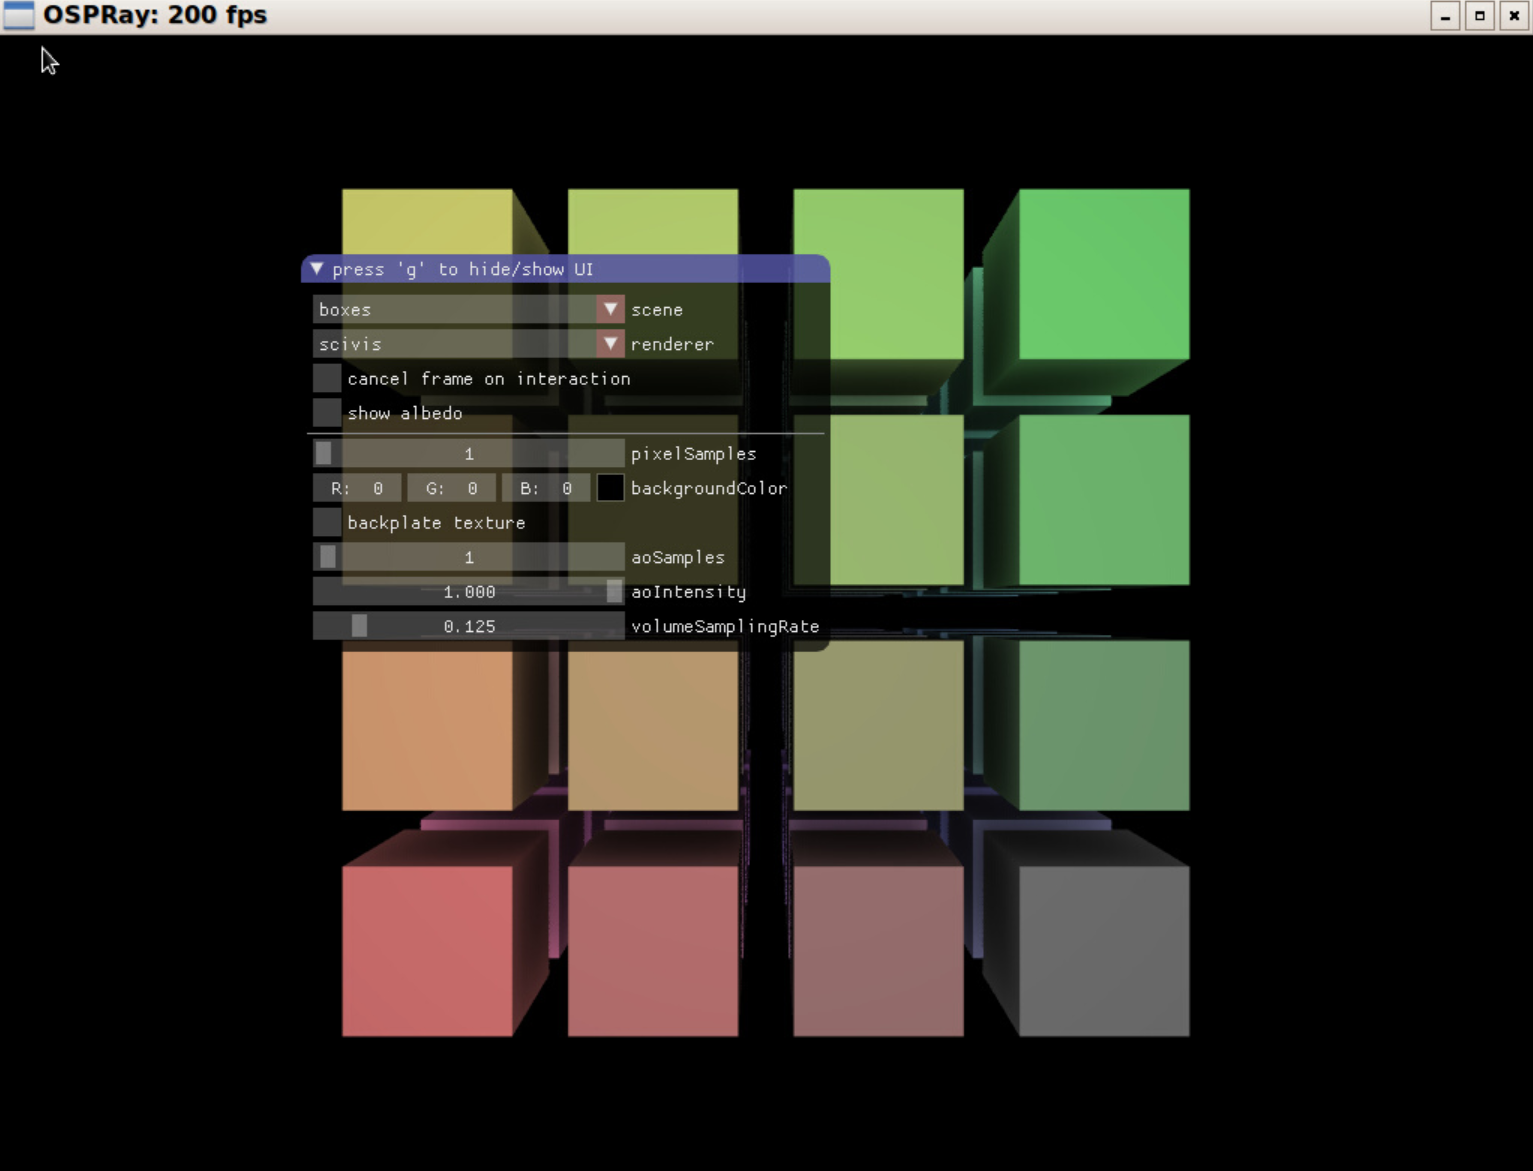
ospExamples
Apart from tutorials, OSPRay comes with a C++ app called
ospExamples
which is an elaborate easy-to-use tutorial, with a single interface to
try various OSPRay features. It is aimed at providing users
with multiple simple scenes composed of basic geometry types, lights,
volumes etc. to get started with OSPRay quickly.
ospExamples app runs a GLFWOSPRayWindow
instance that manages instances of the camera, framebuffer, renderer and
other OSPRay objects necessary to render an interactive scene. The scene
is rendered on a GLFW window with an imgui GUI
controls panel for the user to manipulate the scene at runtime.
The application is located in apps/ospExamples/
directory and can be built with CMake. It can be run from the build
directory via:
./ospExamples <command-line-parameter>The command line parameter is optional however.
Scenes
Different scenes can be selected from the scenes
dropdown and each scene corresponds to an instance of a special
detail::Builder struct. Example builders are located in apps/common/ospray_testing/builders/.
These builders provide a usage guide for the OSPRay scene hierarchy and
OSPRay API in the form of cpp wrappers. They instantiate
and manage objects for the specific scene like
cpp::Geometry, cpp::Volume,
cpp::Light etc.
The detail::Builder base struct is mostly responsible
for setting up OSPRay world and objects common in all
scenes (for example lighting and ground plane), which can be
conveniently overridden in the derived builders.
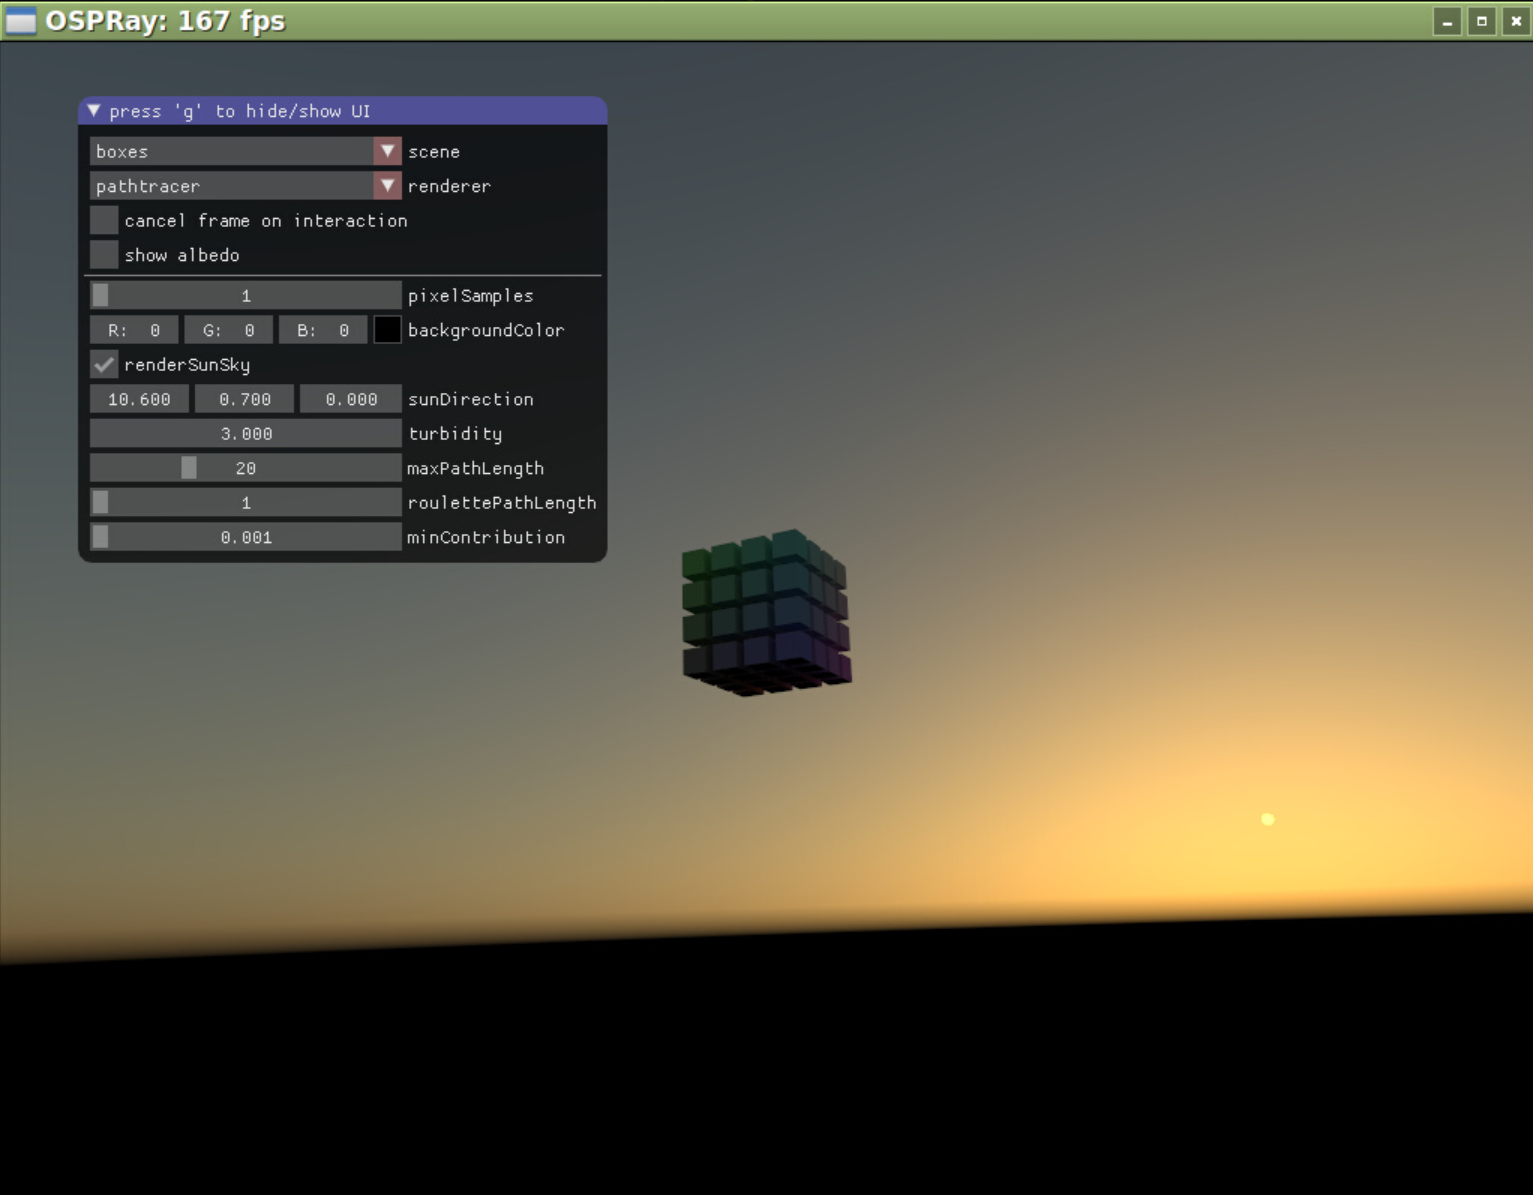
Renderer
This app comes with four renderer options:
scivis, pathtracer, ao and
debug. The app provides some common rendering controls like
pixelSamples and other more specific to the renderer type
like aoSamples for the scivis and
ao renderer or maxPathLength for the
pathtracer.
The sun-sky lighting can be used in a sample scene by enabling the
renderSunSky option of the pathtracer
renderer. It allows the user to change turbidity and
sunDirection.
ospMPIDistribTutorial
A minimal working example demonstrating how to use OSPRay for
rendering distributed data can be found at modules/mpi/tutorials/ospMPIDistribTutorial.c2.
The compilation process via CMake is the similar to apps/tutorials/ospTutorialFindospray/,
with the addition of finding and linking MPI.
To build the tutorial on Linux, build it in a build directory with
mpicc -std=c99 ../modules/mpi/tutorials/ospMPIDistribTutorial.c \
-I ../ospray/include -L . -lospray -Wl,-rpath,. -o ospMPIDistribTutorial
On Windows build it can be build manually in a “build_directory\$Configuration” directory with
cl ..\..\modules\mpi\tutorials\ospMPIDistribTutorial.c -I ..\..\ospray\include -I ..\.. ospray.libThe MPI module does not need to be linked explicitly, as it is loaded as a module at runtime.
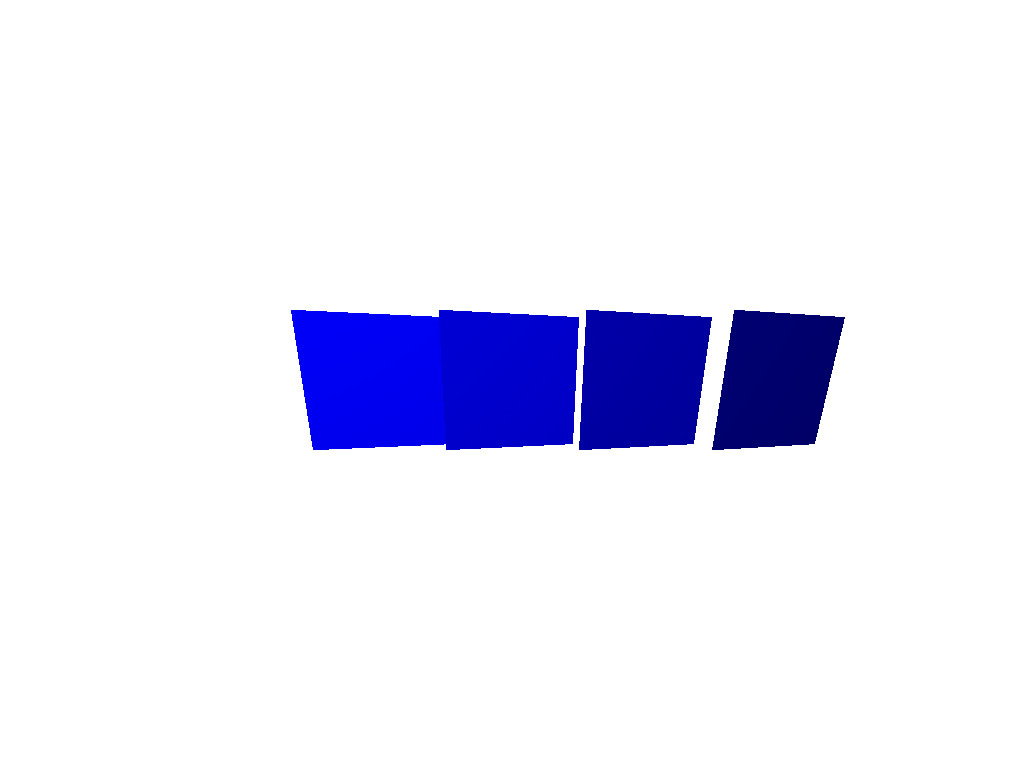
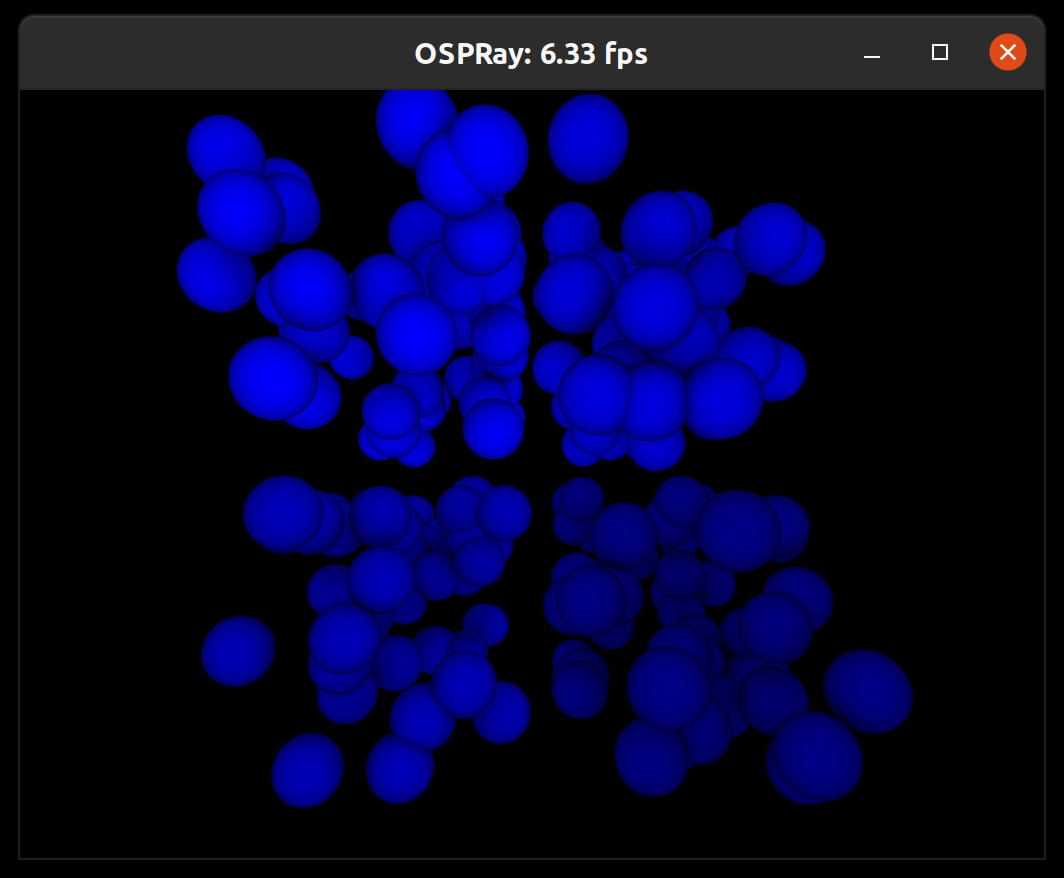
ospMPIDistribTutorialSpheres and ospMPIDistribTutorialVolume
The spheres and volume distributed tutorials are built as part of the MPI tutorials when building OSPRay with the MPI module and tutorials enabled. These tutorials demonstrate using OSPRay to render distributed data sets where each rank owns some subregion of the data, and displaying the output in an interactive window. The domain is distributed in a grid among the processes, each of which will generate a subset of the data corresponding to its subdomain.
In ospMPIDistribTutorialSpheres, each process generates
a set of spheres within its assigned domain. The spheres are colored
from dark to light blue, where lighter colors correspond to higher
ranks.
In ospMPIDistribTutorialVolume, each process generates a
subbrick of volume data, which is colored by its rank.

ospMPIDistribTutorialPartialRepl
The partially replicated MPI tutorial demonstrates how to use OSPRay’s distributed rendering capabilities to render data sets that are partially replicated among the processes. Each pair of ranks generates the same volume brick, allowing them to subdivide the rendering workload between themselves. For example, when run with two ranks, each will generate the same brick and be responsible for rendering half of the image tiles it projects to. When run with four ranks, the pairs of ranks 0,1 and 2,3 will generate the same data and divide the rendering workload for that data among themselves.
The image work subdivision happens automatically, based on which ranks specify the same bounding box for their data, as demonstrated in the tutorial.
The partially replicated distribution is useful to support load-balanced rendering of data sets that are too large to be fully replicated among the processes, but are small enough to be partially replicated among them.
ospMPIDistribTutorialReplicated
The replicated MPI tutorial demonstrates how OSPRay’s distributed rendering capabilities can be used to render data sets that are fully replicated among the ranks with advanced illumination effects. In this case, although the processes are run MPI parallel, each rank specifies the exact same data. OSPRay’s MPI parallel renderer will detect that the data is replicated in this case and use the same image-parallel rendering algorithms employed in the MPI offload rendering configuration to render the data. This image-parallel rendering algorithm supports all rendering configurations that are used in local rendering, e.g., path tracing, to provide high-quality images.
The replicated MPI tutorial supports the same scenes and parameters
as the ospExamples
app described above.
This mode can be useful when high-quality rendering is desired and it is possible to copy the entire data set on to each rank, or to accelerate loading of a large model by leveraging a parallel file system.
A C++ version that uses the C++ convenience wrappers of OSPRay’s C99 API via
include/ospray/ospray_cpp.his available atapps/tutorials/ospTutorial.cpp.↩︎A C++ version that uses the C++ convenience wrappers of OSPRay’s C99 API via
include/ospray/ospray_cpp.his available atmodules/mpi/tutorials/ospMPIDistribTutorial.cpp.↩︎